Lumion 12 Has Arrived! It might be a little light on major features… BUT, it does have a TON of incremental improvements that combined are actually very significant. Improved workflow, organization, and usability has been sprinkled into every corner of this release. There’s one thing missing though, and it’s a feature I have been wanting for years!
Watch the video below (or keep reading) for my top 6 favorite new features, and a feature request that would make a huge impact on image composition. (Check out the full Lumion 12 release notes here)
The new volumetric spotlights effect is the Lumion eye candy that keeps us coming back for more. It can be found in the Lighting Category in both the photo and animation studios.
I used to just haphazardly add a little warmth or color to my lights, but the new slider and presets take the guesswork out of it and make lighting more realistic. You can find it by following these steps…
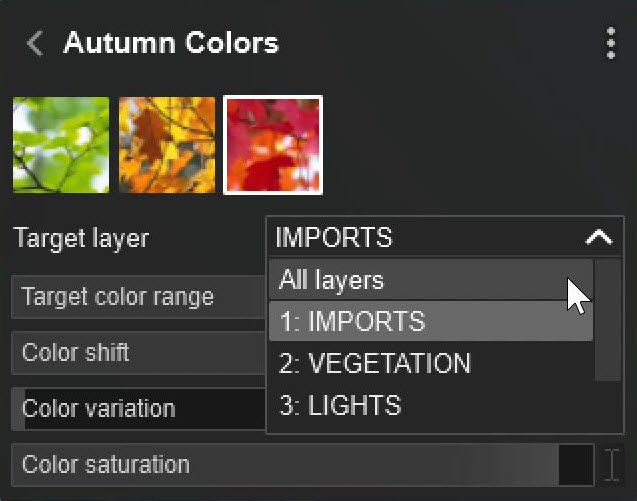
The improved Autumn colors effect can be found in the Sky and Weather tab. In previous versions this effect required that you target a specific layer, so all trees had to be on one layer. In Lumion 12, you can target all layers, so now you don’t have to meticulously organize your scene with layers… Although, that’s never a bad idea!
Check out the new presets that run along the top, choose from green, ochre, or red. The other sliders often do more harm than good. A preset combined with “target all layers” is everything you will need moving forward.

License plates add a dash of realism and give your audience a hint at where your project is located. Choose the global license plates for all cars in your scene by following these steps…
Both the Object and Materials libraries have received a face lift and faster navigation.
This new billboard object is great for quick 2d cutout people and even trees. If you are looking for some images to load check out our crowdsource 2d cutout character library which has 42 different characters, each with around 35 poses, netting over 1400 clean cutout character images.
I like the new billboard object, but here’s the problem with placing 2D cutout characters… they only look right from one camera angle! If you move the camera, the characters are all jumbled up on top of one another.
You could use some layer trickery, and duplicate models, but what a hassle to set that all up, especially for multiple cameras. What I’d like to do is just add the Move effect in photo mode, so I could rearrange my character’s position for each camera. Unfortunately the move effect is blocked in the photo studio!
Now render out the still images as an image sequence…
One keyframe per second will net one image per clip. Another bonus to rendering stills in the movie studio is that you can batch render 30 images on one timeline vs only 10 at a time in a photo set.
You can use this technique to better arrange any objects for a specific view without affecting placement in build mode, or other cameras…
So, why don’t we have the move effect in the photo studio!? Do you agree with me? What are your feature requests!? What are you working around? What do you think of Lumion 12!? Let me know in the comments.